Showing posts with label microsoft operating system support uk. Show all posts

How to Optimize Your Windows Vista

Monday, September 14, 2009
Run a Virus Check

The moment you notice your PC is running slowly, the first thing to do is to check it for viruses and spy-wares. Viruses have a way of slowing down a computer and makes it run slower than it used to.

Defragmentation can be defined as a process that helps reduce the amount of fragmentation in a file system. Fragmentation makes your hard disk do more work than necessary and this can slow down your computer. A Disk Defragmenter is what you need.

A Disk Defragmenter reorganizes fragmented data and place them close together, so that your hard disk can have more space and perform better. Disk Defragmenter can be found on your windows vista help by going to the ”Start icon” of your computer, click on ”All Programs”, open ”Accessories” , then ”System Tools” and finally click on ”Disk Defragmenter”.

Boost your Computer Memory

Use Windows Ready Boost to boost your computer memory. The Windows Ready Boost enables you to use the storage space on detachable devices, such as flash drives, to increase the speed of your computer. This is a preferable way of increasing your PC memory, than opening the computer hardware.

Uninstall software and programs you never use

Do you know that most of the limited trial editions versions of programs you find in your computer when you bought it can slow your computer down? These trials software use up valuable disk space and memory, so if you do not intend to upgrade to a full version of the program or software, it is advisable to uninstall it from your computer to save you more disk space, memory and even processing power.

Clean up your hard disk

If you want to help your computer run faster, you can also remove unimportant files on your hard disk and empty the Recycling Bin by using the Disk Cleanup. Here is a step-by-step instructions on how to do this.

1. First begin by clicking the ”Start icon”, click on ”All Programs”, then ”Accessories”, open ”System Tools”, and then click on ”Disk Cleanup”.

2. You have the option to choose if you want to clean up your personal files only or all the files in the computer.

3. In the Disk Cleanup Options dialog box If the Drive Selection box comes up, choose the hard disk drive that you want to clean up, and then click on ”OK”.

4. Select the Disk Cleanup tab, and click on boxes of the files you want to remove, then click on ”OK”.

5. Finally click on ”Delete files” to confirm total removal of the unwanted files.

Reduce Start-up programs

When you put on your computer, you notice that some programs loads automatically at start-up, these programs take up disk space and waste memory and also slows down the loading power of your PC. Most of these programs are designed by Software manufacturers to load automatically when Windows starts, some of them even run in the background where you can’t see them, and are only designated by their icons on the notification area on the task-bar of your computer screen. So to help your windows vista PC work faster and be more efficient, delete the ones you don’t use often.
Repair Windows Vista

Wednesday, December 17, 2008
Now that just about everybody knows how to use the XP Recovery Console Microsoft's newest operating system does not contain one. Not to be bothered we have a detailed article that will walk you through how to use these great new features in Vista.
The reason of this article is to teach you how to make vista repairs if you are having startup issues or you can't seem to use the vista system restore option. There are two ways to use these options and they depend on if you have a Microsoft Windows Vista install disk or if Vista was pre-installed on your OS you will have a ghost image on your hard drive.
If you have the windows vista repair disk: (This should be your backup copy of Vista if you made one)
PLEASE NOTE: This Vista install CD can be run from within Vista. Just insert the CD once Vista has loaded up and go to install, go > Install Now > Upgrade.
1. Boot up with the Vista install disc
2. You should see a screen that says "Windows is loading files"
3. After a few minutes you will get a language option. Select your language and hit next.
4. On the install screen select "Repair Windows Vista computer"
5. Windows will find your copy of Vista on the machine
6. Select your copy of Vista and click next
7. You will now see the following options.
* Startup repair - This automatically fixes problems that are preventing Windows from starting

* System Restore - This will Restore Windows to an earlier point in time

* Windows Complete PC Restore - This will completely restore your entire PC - programs, system settings and files - from a back up that you have previously created (Available in Windows Vista Business, Enterprise and Ultimate editions only)

* Windows Memory Diagnostic Tool - This checks your computer's memory hardware for errors

* Command Prompt
8. Assuming you are using this option because you were unable to boot to Windows Vista select the system Restore option and then select the date you would like to go back to. If your OS is fine you can always use the startup repair option.
Pre-Installed and OEM versions: (please check with your manufacturer fist. They may have replaced these tools with their own.

1. Turn your computer on and start pressing the F8 key. If you see the Windows Vista Logo you have gone too far and need to reboot and try again

2. You will get an advanced options screen. Select the "Repair your computer option" and hit enter.

3. Select your language and hit next.

4. Enter your user name and password and then next.

5. The recovery options should now appear.

6. In most cases just using the system restore to set your computer back will solve your issue. If this is not the case try the Startup repair option.

How to Repair Windows Vista?

Thursday, November 20, 2008
The intention of this article is to teach you how to repair vista if you are having startup issues or you can't seem to use the vista system restore option. There are two ways to use these options and they depend on if you have a Windows Vista install disk or if Vista was pre-installed on your OS you will have a ghost image on your hard drive.
If you have the windows vista repair disk: (This should be your backup copy of Vista if you made one)
PLEASE NOTE: This Vista install CD can be run from within Vista. Just insert the CD once Vista has loaded up and go to install, go > Install Now > Upgrade.
1. Boot up with the Vista install disc
2. You should see a screen that says "Windows is loading files"
3. After a few minutes you will get a language option. Select your language and hit next.
4. On the install screen select "Repair your computer"
5. Windows will find your copy of Vista on the machine
6. Select your copy of Vista and click next
7. You will now see the following options.
* Startup repair - This automatically fixes problems that are preventing Windows from starting

* System Restore - This will Restore Windows to an earlier point in time

* Windows Complete PC Restore - This will completely restore your entire PC - programs, system settings and files - from a back up that you have previously created (Available in Windows Vista Business, Enterprise and Ultimate editions only)

* Windows Memory Diagnostic Tool - This checks your computer's memory hardware for errors

* Command Prompt
8. Assuming you are using this option because you were unable to boot to Windows Vista select the system Restore option and then select the date you would like to go back to. If your OS is fine you can always use the startup repair option.
Pre-Installed and OEM versions: (please check with your manufacturer fist. They may have replaced these tools with their own.

1. Turn your computer on and start pressing the F8 key. If you see the Windows Vista Logo you have gone too far and need to reboot and try again

2. You will get an advanced options screen. Select the "Repair your computer option" and hit enter.

3. Select your language and hit next.

4. Enter your user name and password and then next.

5. The recovery options should now appear.

6. In most cases just using the system restore to set your computer back will solve your issue. If this is not the case try the Startup repair option.

Source: ezinearticles.com.

Create the Vista Sidebar in Windows XP

Tuesday, November 18, 2008

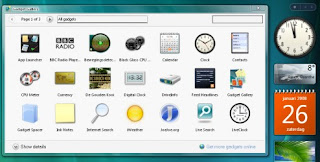
It is just only for Windows: If you don’t want to adopt Windows Vista yet but you’ve taken a shine to the Vista Sidebar. In other word we can say fancy having a Windows sidebar on your Windows XP desktop and run popular gadgets such as live clock, Calendar, Currency Convertor and iTunes Songs etc. Google etc. Then Windows XP desktop provide that facility to instant access of that gadgets by porting vista sidebar on that. Windows Sidebar is available only for Windows Vista, however, for Windows XP users, a ported version of XP side bar are available for free download. And the Windows Vista Sidebar pack is free, Windows XP only. For further information you can go through with that url http://www.iyogi.co.uk.